There you go man Keep as cool as you can Face piles of trials with smiles It riles them to believe That you perceive the web they weave And keep on thinking free
–The Moody Blues, “In The Beginning”
I’m tired of the bullshit. Side note, I wrote this late in the evening after witnessing some of that bullshit, and I’m not proofreading it today. So there might be some incomplete thoughts here, but… I know if I sit on it to fine tune and polish it, I’ll either keep repeating myself or just never hit save. So here it is.
Everyone wants to rant about how evil “AI” is. And I get it, I really do. But let’s start with some basics. First off, none of this is “Artificial Intelligence.” What you’re complaining about is called a “Large Language Model” and it’s not intelligent at all. Step outside of its training and it has no idea what to do, and doesn’t even have an idea of how to figure out what it might need to know to figure out how to answer you. So that’s the first issue I have when people whine about AI, is that what you’re whining about isn’t even AI.
Ok, next. Yes, LLMs have been fed with all kinds of things, including things that are copyrighted. They’ve been fed with copyrighted text works, copyrighted images, all manner of stuff that means they’re rife with junk and ready to start creating “plagiarized” works that are based on other things. On that point, I can fully agree that a LLM fed with copyrighted works and asked to churn out other things that are based on copyright are bad, and are creating problems for artists.
But some of the arguments against “AI” are completely bogus. They use 500 million gallons of drinking water a day? No, not a chance in hell. Hank Green did a nice video on how crappy some of these numbers are.
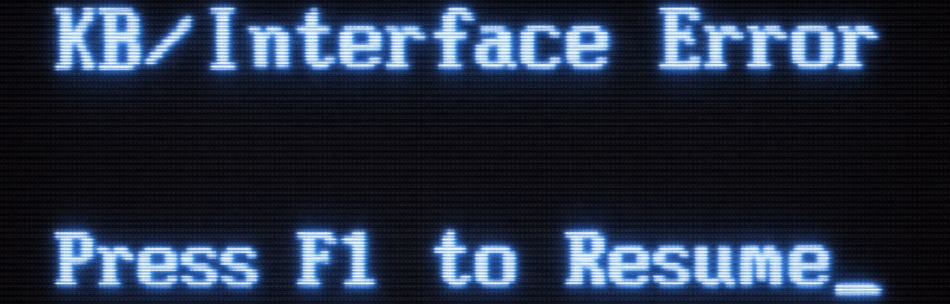
And probably the worst thing is some of the crap I see in some circles where anything remotely thought to be “AI” is shunned and the person posting it shunned for doing so. First off, it’s becoming this generations “that looks ‘shopped” and getting annoying. The header image on this site now? It’s been “generated” by AI. In that I took the image, some 20 or so years ago, with a shitty camera phone, and told ChatGPT to clean it up so it’s a nicer resolution but retains the scan lines and bloom that are reminiscent of a photo of a CRT. And it did. And I’m quite happy with it. Because I’ve always thought that was hilarious, that the BIOS detected a problem with the input device, then wanted me to use that same input device to signal that it should continue.
I’ve had some long conversations with ChatGPT. Some topics were technical, some were personal. Some were about programming things, some about hardware things, some about life things. Some were about trying to find an old comic that I remember seeing and can’t locate. Some I left thinking, “well that wasn’t much help,” while others I left wondering how it knew exactly what I needed to hear.
I understand there’s a lot about “AI” right now that people are unsure of. But I really wish they’d stop pushing back against it as vehemently as they are, because it really feels like the buggy whip industry complaints when the automobile was first introduced, and I can’t help but think that those whining are going to be the laughing stock and left behind when things continue to move forward and I don’t want to see that happen. Sure, the technology has its problems, but every tech does, and we need to see how the tool works best for everyone and use it as such, not throw it out because we’re afraid of it, annoyed by it, or just don’t yike it.
I know this isn’t really a fully fleshed out discussion. But I saw once again recently where something was posted that resulted in a bunch of “that looks like AI” bullshit, and .. I’m just sick and tired of whiny cunts. So rather than ranting at them, I’m ranting in general. And I’m doing it here instead of at ChatGPT. So… go me?
Open doors we find our way We look, we see, we smile Surely day-breaks cross our path And stay maybe a while
–Yes, “Ritual (Nous Sommes du Soleil)”
Been a while, as often happens. I’ll summarize a few things since that’s what’s on my mind and what brings me here today 😀
Emily really wanted the Epic limited edition boxed set and we got it for her for Christmas; but my old turntable was still not operational since we moved here, as the Yamaha receiver we had didn’t have a phone pre-amp – though it subsequently died anyway – and the JVC we used to use before it wasn’t working well anyway and wasn’t usable for things after all. So I finally bit the bullet and picked up a new receiver, then got the equipment I knew I’d need to get the turntable up to snuff: a new cartridge since I never replaced the one on it for the entire time I used it (got a new stylus and kept using that), and a new belt since the old one was .. well, old. Got things sorted out, pulled the LPs out of the cabinet they were shoved into and organized them (and found out about Discogs, which will be great next time I go to the thrift store), even played a few albums to test things out. Christmas day she was thrilled, and David got a couple albums as well since once the kids knew vinyl was an option they put some on their wish lists. Parenting win. I got some new records too, so overall win.
Also on my wish list was a new weather station, an Ambient Weather WS-2000, because the one I got a few years ago started acting strange – doing things like reporting the temperature some 20-30 degrees lower than it was, for example. Some things said that could be a result of low batteries, and it had been up long enough that I thought that might be an issue too, so this spring/summer I pulled it down off the garage and replaced them. Unfortunately, things didn’t improve, so I figured it was time to shop for a replacement. Well I got it for Christmas, and currently have it sitting on my front porch bungeed to the railing while I test things out, but I’ve already set it up in weewx replacing the La Crosse one. Tomorrow I plan to be out, though the wind will be pretty high anyway, so on Wednesday I’m hoping I can climb up and swap out the old one for the new one. Then I can ring in the new year with new weather measurements that will be more accurate than the -40F that the old one said it was this morning. And you can see all the published goodness here: https://srhuston.net/weather/
Oh, and the quote and image? I was listening to Tales from Topographic Oceans as I wrote it. And listening to music on vinyl is a kind of ritual, if you do it right. And I did. And it was. And it was glorious.
I’ll expand on it in a real post at some point, but the short story is that the wife (and daughter) are getting more into radio again and so I finally have a reason to want to install my FTM-400 in the VW Atlas. Now to hope that I have the strength, stamina, and ability to do it. I’ve done radio installs a few times now (Sport Trac, Escape, and the Transit Connect) so I’m certainly no stranger to the process, but I was younger then and working on a new car. Now it’s a 7-year-old car and I’m… not younger. At the very least, there will be no dropping of headliner and drilling of NMO mount, because there’s too damned much glass up there to find a spot of metal to drill through.
I might be movin’ to Montana soon Just to raise me up a crop of Dental Floss
–Frank Zappa, “Montana”
This is completely ridiculous. But there it is.
I like to read a bit in bed before nodding off. I know, you’re supposed to put tech away, but I do put it in “night mode” and I don’t do too much, and it does really help me unwind. Sometimes I read an actual book, but sometimes I don’t want to deal with the weight of it. Anyway, sometimes I find something and think to myself, “I want to see more about this later” (or maybe “I need to see this on a bigger screen” or even “I need to see this when I’m more awake”) and finding that in Chrome on iOS I could easily add something to my “reading list”, well that’s just perfect. I used to use Pocket for that a lot, but what I found is that I’d put something there and then never look at it again because it was out of the way. The Chrome reading list, though, is right there in Chrome, so it should be a lot easier to see it and remember!
Except, well, it’s not. See I’d add something, and then some days later I might open a tab on my phone and there’s a little “1” on the “Reading List” shortcut button on the phone. Then I’d think, “didn’t I save that like a week ago?” Maybe I’d look at it again, but still come to the same conclusion – I need to look at this from my desktop, so I’ll just leave it there. Then next time I sit at my desk, there’s nothing to indicate that something is waiting for me, and I’d continue to forget about it.
I went looking last weekend for a solution. I figured there had to be a way to put a little number on the desktop Chrome application to say “you’ve got three things waiting here to be read.” But as it turns out, there isn’t. You can add the reading list icon to the toolbar so you can click a single thing and have it show up, but there’s no indicator there as to how much stuff is sitting on it. So I looked online, and couldn’t find anything either. And then I did something I didn’t think I would do: I asked ChatGPT.
AI is a real hot-button topic anymore. And I see many sides to the issue. I’m friends with artists who rightfully point out the ways in which large language models and AI systems do things that harm both their art, their trademarks and intellectual property, and their livelihoods. And I agree that’s something that is a huge problem. I see people talk about the amount of power that is used to train the models, and run things through them, and I know they’re not wrong – my job is alongside HPC systems and I see the amount of energy and compute power that goes into various things that sometimes are used to run LLMs and other trainings. But, I also see things like AlphaFold which have advanced some aspects of computational biology, and so when I see sweeping statements like “BAN ALL AI!” or people saying “DON’T USE AI!” I cringe because I see the good it can do as well. Of course the bad things need to be figured out. But didn’t people say the internal combustion engine was a horrible idea because of what it would do to horses? Maybe that’s a bad comparison, I don’t know.. I’m not a philosopher, I’m a tinkerer. I’ll leave the philosophy and bigger topics to others to figure out the details and stick to the stuff I definitely know better… so let me get back to tinkering, and tell you about what I did.
I started by asking ChatGPT if what I wanted to do already existed. It confirmed what I had already found, that it didn’t exist today, but gave me five ideas: Use a bookmarks folder and an extension to watch it, use a tab management extension and save tabs that way, save such links in Google Keep or Tasks and use an extension on the desktop to monitor them, use an experimental feature flag that might do the trick, or write my own extension to do what I wanted. The first two options I dismissed right away because they ignore the reading list entirely and use something else, and I didn’t want to do that. The third I dismissed because I already use Google Keep for other things and wouldn’t want to have to change my use of it for this idea. And the fourth I’d already looked into, and found that the flag mentioned is apparently only available on Android devices to show a badge for them and wouldn’t work on the desktop anyway. So I replied that making an extension is an interesting idea, but I don’t even know what the language is so let me hear more about it.
Chrome extensions are written in a combination of JavaScript and HTML, with some CSS thrown in for formatting if needed. Well, I’m not terribly familiar with JavaScript but I’ve done a little bit, and my background in computer science helps me “grok” a language even if I haven’t seen much of it before, so when ChatGPT asked me if I wanted to try building an extension I said sure. It then gave me the basics I needed – create a directory, create these files with these contents, and how to load it into Chrome in developer mode. I looked over the files and it was basically going to make a simple toolbar icon with a static number on it as a test; everything made sense to me, so I went ahead with it. When I got an error I came back and described the error and was told the way to fix it – every error in this process was one ChatGPT made, not me, which was interesting, but it was also interesting that it was able to fix them when they were pointed out. When that worked, I was presented with some ideas on how to make the number indicative of the actual number of items on the list, but again it diverged into trying things like counting the number of bookmarks in a folder which would mean doing things differently.
When it first told me about the idea of making an extension and then started giving some other information, I looked and found an API call that seemed like it might work to interact with the reading list. However, ChatGPT said that API wouldn’t be available to me because it was internal or experimental, and that an extension that used it would never make it to the Chrome web store (which honestly, at that point, wasn’t even something I was thinking about). Well, wondering if it might work anyway, I modified the JavaScript to reference that API and it worked. So I told ChatGPT the good news, and it ran off to make another update that would actually do what I needed. Well, it tried to, but again the code it gave me was wrong – for one thing, the call itself was to the wrong method, and it needed an argument that I didn’t provide. Since I don’t know much about the language I didn’t catch the second error though I did account for the first, and came back with another update. Again I was given something that should work, and this time it did. Rather than just saying “that works” I directed the conversation, namely I didn’t want an HTML page to pop up when I click the button but instead to open the reading list itself. Again ChatGPT told me that may not be possible and the reasons why, but I pushed; even if it’s going to give me an error, I’d like to see that error and how it fails, at the very least to learn more about how this works. So please give me the code that you think will fail and let me see it fail. It did, and interestingly I didn’t see the failure – because there was another thing I needed to change, which it had also forgotten.
I’m now seeing a trend here. There’s a lot of information and utility I’m getting out of this, but it’s by no means a way to simply say “I want this thing” and have it come to being. If you don’t know anything about programming, you might hack through it with a few more iterations than I used; a few times I could tell what wasn’t working and nudged things in the right direction, for example, and having read the API documentation I had a feeling it was wrong about the one API being unpublished and unusable. But on the other hand, I walked into this transaction with no idea how to make an extension, and I already know a lot more about it than I did when I began. So it’s not a replacement for programming knowledge, but it definitely helped me learn something new in this case.
I went through a few more iterations of things – asking if the built-in icon was available somehow, or if I had to get it from the source, and deciding to get my own instead; adding other watchers to update the count when things were added or removed from the list; removing the default pop-up that was created early on so that clicking could trigger some other action – and then asked how I go about publishing it, because why not at this point? I was given most of what I needed to get started, and went to create my developer access. Uploaded the extension information, added some screenshots, and clicked submit. The page said it could take a week or two in order to be published, but just two days later it was in the store and ready, my aptly named “Reading List Counter“. So if you want a silly icon to sit in your toolbar to remind you that you need to look at the reading list, there you go. I’m probably going to change a few things since this first iteration is extremely basic, like maybe have the color change when it’s not zero (or be missing when it is), and I need to add a hook to change the icon depending on if it’s in light or dark mode because I realized the following morning that it disappears when Chrome switches to light mode. Whoops.
So that was my day on Sunday. Kinda productive all things considered, because I learned a few new things: 1, building a Chrome extension isn’t terribly difficult if you want to do it; and 2, ChatGPT can be a lot of fun, and a very useful tool. It shouldn’t be relied upon for everything, and as it even says itself the output should be checked for validity. And of course there exists all the reasons why various LLMs and forms of AI are bad for .. well, everything. But I don’t think it should all be thrown out. We need to figure out what the answer is, but I don’t think banning it is the right one, nor is shunning those who use it. Some times you might get good information out of it, and if you’re careful about how you’re doing things you may come away from it better than you arrived, and that’s not a bad thing. By all means, tell me your thoughts on it, just try not to be polar – it’s neither the end of all civilization, nor the answer to all of life’s problems.
Comenity (aka Bread FInancial) can join the ranks of places that can suck me.
Yeah, really starting strong out the gate with that one aren’t I? Well, not without good reason. Stephanie and I got new iPhones this week, and last night I helped her get things set up in Apple Wallet. She hadn’t really used it before, so nothing transferred from the old phone. No problem, this is pretty painless – especially with the NFC reader in the phone that can literally grab all the card data out of thin air. We set up one card which asked for a 6-digit code to be SMS’d, no problem. Then we came to my PlayStation Visa card. Her card doesn’t have a tap-to-pay feature so the data had to be entered by hand. No problem, that’s easy enough to do and we did. Then it came to the verify stage, and the only option was to call them. Well, neither one of us felt like talking to someone, but OK fine we’ll do that.
Stephanie was answering the questions at first which was fine, but as soon as I spoke the agent got really shitty all of a sudden. I said I’m the primary account holder, my wife is the authorized user, and we’re trying to set this up on her phone. Continuing with his snippiness he asked a few other questions, and then finally said he would have to verify me to continue. No problem. He said can we use the number on file as (last four digits of my phone number) and I said that would be fine, I just did that a couple weeks ago when logging in. Quite a bit of time passed, and then he came back and said that he couldn’t verify using that phone number, so he would be unable to continue. I said that’s unfortunate, and was just about to ask what do I have to do next to verify things, when he let out the more interesting part.
“Further, that means we have to place a hold on the account until it’s been reviewed.”
The fuck? He went on to explain that because my phone couldn’t be used to verify things, he had to put a hold on the whole damned card – not just hers, but mine as well, the one that has a bunch of monthly bills go to all the time because why not that’s how I’ll rack up PlayStation points I can redeem for gift cards and get free games or even just pay for PlayStation Plus for a year. I asked what do we have to do about this and he said there’s nothing he could do. So I said something I rarely do: “Then you’re going to march your way up the chain of command until you find someone who can do something, because this needs to be fixed immediately. Don’t worry about the time, I can wait.”
A few minutes later and after a few times of “sorry about the wait”, he hung up on me.
I got the number off the back of my card – which is different than the iPhone told me to call, understandably so one is for customer service and one is probably specialized for activations – and called Comenity directly. Interestingly, when their system answered, it asked for the last four digits of my SSN, and then knew who I was without asking for my card number. So apparently they DO know who I am based on my phone number, don’t they… anyway, a nice gentleman answered and heard me out, understood what the problem was, but also said he couldn’t help directly but that he could transfer me to the account security office or something like that, and they might be able to give some more information. He then proceeded to hang up on me instead of transfer my call.
Ok, now I’m fucking pissed.
I sat and stewed for a bit, and took some time to look through Google Voice settings; specifically, there used to be a blanket setting in GV for incoming calls from people not in your contacts list. At some point that got removed, so I was not sure how I would set things so that I would get phone calls from people not in my contacts. After some more experimentation it seems that the answer is to use the setting in the phone itself now – turning it on there means nobody outside my contacts will ring the phone and the calls will go to Google voicemail, and turning it off makes the phone ring and I can answer or dump the same as I would before. This is fine, just wasn’t expected since I didn’t know things moved around, but now that I know I’m OK with it. But I noticed something else while looking through these settings – that first agent, the one who tried to verify my phone and said he couldn’t, did so by having the system MAKE A PHONE CALL TO TALK TO ME. That was never stated ANYWHERE that it was going to make a call. If it was, I’d have said you’ll have to wait a moment because things are configured that my phone will not ring right now, and I may have even said let’s deal with this tomorrow instead. I assumed, and perhaps that’s a bad thing but I think it was a safe assumption to make, that “verifying your phone number” meant they were going to send me a six-digit number in an SMS and I’d read it off to him. I’d even joked with Stephanie that this guy was being a bit of a prick or else I’d point out that I shouldn’t give that number to anyone, that’s how phishing works, but he probably wouldn’t get it.
So now I know that the first asshole was so incompetent as to not actually tell me what the process was for verification, but then to “fail” me for not doing something I had no idea I had to do because he didn’t tell me. And, Comenity’s phone system sucks because I got hung up on twice now. Three times, actually, because after taking some time to collect my thoughts and discover this information, I called back and this time the automated system said it was routing me to whatever department that was immediately. I found this amusing a little, because it’s as if they already know “this person doesn’t want to talk to the initial CSRs, get them right to the point.” I stopped being amused, however, when after it said I would be transferred I again got hung up on.
My fourth call also got routed right to the department I wanted to talk to, and this time a nice woman answered and took down all my information. Unfortunately she also claimed to have no control over it, but that the department would look over things and there would be an answer in “three to five days” (later confirmed to be business days). So if you’re keeping score, this means some idiot who got pissy that there was more than one person on a phone call then screwed up and didn’t tell me how exactly he was going to verify my account (nevermind if I was calling from my phone, that wouldn’t have worked either), then locked my account and hung up on me, and has basically shut me out of all of my automatic payments and billings for up to a week.
Suddenly, the fact that I can get PSN gift cards for free games isn’t worthwhile to me anymore. Time to take my money elsewhere.
Dangit, I really want to go sit outside by the fire pit with some number of the children (whomever wants to join)… but the NWS alert from this morning is reminding me that fire danger is high, and while I may have a hose near me and know how to properly put things out at the end of the night, I don’t want to be the next one shown as arrested after a multi-kiloacre wildfire. Even though that wouldn’t happen here. Meh.
Getting late. Not tired. Hand isn’t aching but I’m not pushing it. Oh yeah, the left started feeling “left” out and now it’s hurting worse than the right. Yay. Laundry just went in, everyone else is in bed or close to it. Guess I’ll sit here with some crosswords, music, and incense and wait until my shirts are dry.
Is it any wonder I’m not crazy Is it any wonder I’m sane at all
–Styx, “Too Much Time on My Hands”
Yep, it’s been a while, and I’ll have to get back into things again. But I’ve had some pretty major issues with my hands; the left was just a standard arthritic flare, while the right, well we’re not entirely sure what’s wrong with it. Symptoms are similar to “trigger finger” though it’s not causing my finger to curl up or anything, more like it felt like the tendon on the right index where it runs past my thumb was injured and if I moved the wrong way, or too much, it would hurt anywhere from a sharp pain (felt like it was tearing) to a dull and heavy ache like it was bruised and battered. So I’ve been doing what I can to alleviate pressures – folded up the right armrest on the chair so I don’t lean my elbow on it, which I often do when I’m reading things or deep in thought; switched to using a mouse with the left hand (and then back to the trackpad) so my right isn’t doing as much repetitive motions, especially on the scrolling; and wear a brace on the right hand to prevent me from moving that finger as much as well as a reminder to not do anything stupid with it.
Of course that all makes typing difficult, so I’ve tried to do as little as I can. Sometimes it’s hunt and peck with a couple fingers, and other times I take the brace off and blaze through something just to get it done, then sit back and do much less for a while. I’ve tried speech to text, but I find that my brain doesn’t filter things making it to the mouth in the same way it does to the fingers, so it doesn’t come out right and I want to edit it “live” which never works. Trying to go back and edit later isn’t going to work for me either, so I’ve just about given up on dictation for now. Maybe I’ll try again a few more times and see if I can get it right, because it could be quite useful – moreso for things like this where it’s really what I’m thinking, as opposed to work where I’d be trying to dictate shell commands, and that’s bound to be a failure.
Still playing AC: Shadows as well, and enjoying it a lot. I’ll talk more about it some other time I think, because it deserves its own space, but that’s been taking up a lot of my time when I’m not working. Feels good to have a game I can sink into again, it’s been a while and the last couple I’ve dove into were replays of things I played before; while they were fun, obviously, it wasn’t quite the same thing since I’d already seen things. Though it was nice when my eldest was playing along as well since we got to share in those moments, Shadows is having that same effect since we’re both playing it (and respecting each other’s pace so neither of us is talking much about story missions or outcomes, especially since while I have a lot more time in it than he does, he has done different missions than I have so we’ve seen different things).
Last thing I want to touch on, which is probably a “buried lede” here, is a thought that keeps coming up. I’ve got all this equipment here, and knowledge of how to do things with it, and part of me keeps wanting to do some kind of podcast. I think I have two problems really, one is that I don’t know what the topic(s) would be because I don’t want to limit myself to one particular thing, and one is that I don’t think I want to do it alone but would have a better time doing it with someone else. I have an idea to solve the first part, which would make the podcast more of an open format, but don’t know what to do about the second part yet. Do I try to pair up with someone specifically? Do I just do a kind of “guest” thing and get various people to join me, either all the time or until I find a rhythm with someone and stick with them? I wasn’t sure about the time commitment to it either, and figured it would end up being a very ad-hoc “released as time permits” kind of thing until Stephanie gave me a really good idea about that too. So now I’ve got even more things to think about.. and talking would certainly be easier than typing right about now.
Speaking of which, I need to get to bed, and rest this hand again. Felt good to put something down though, so thanks for reading this far. Drop a comment somewhere and say hi – I recommend Bluesky anyway since it’s a nice place to be, and you can comment there and have it show up here without even trying so it’s a neat system.
Hands have been needing a rest from typing, so I haven’t been. Plus I’ve been playing Assassin’s Creed Shadows since it came out. But reading a couple things today has me thinking, I really should generate new GPG keys since the ones I have are many years old and probably out of date in terms of security practices (even though I trust none of them have been compromised).
Haven’t been around much for two reasons; one, Assassin’s Creed Shadows released on Thursday, and two, I’m trying not to use my hands for typing/computer work because they hurt and I need a break. So you get a break from my typing because I don’t like how speech to text formats things because I don’t speak the way I write. That is all.


Comments
Join the conversation on Bluesky
the luddites were against machines taking the jobs of humans. LLMs rely on stolen labor. you can call me a luddite in this context.